What if Windows 365 users could resolve common Cloud PC problems without raising a service-desk ticket?
With Nerdio Manager for Enterprise 8.2, that becomes easier to deliver through the Nerdio self-service portal.
Administrators can now enable Windows 365 users to perform selected lifecycle actions on their assigned Cloud PCs, including Restart, Resize, Restore and Reprovision.
The important part is that IT remains in control. Rather than exposing every management action to every user, administrators decide which operations are available through Windows 365 provisioning policies.
For organisations managing hundreds or thousands of Cloud PCs, this provides an opportunity to improve the end-user experience while reducing avoidable service-desk workload.
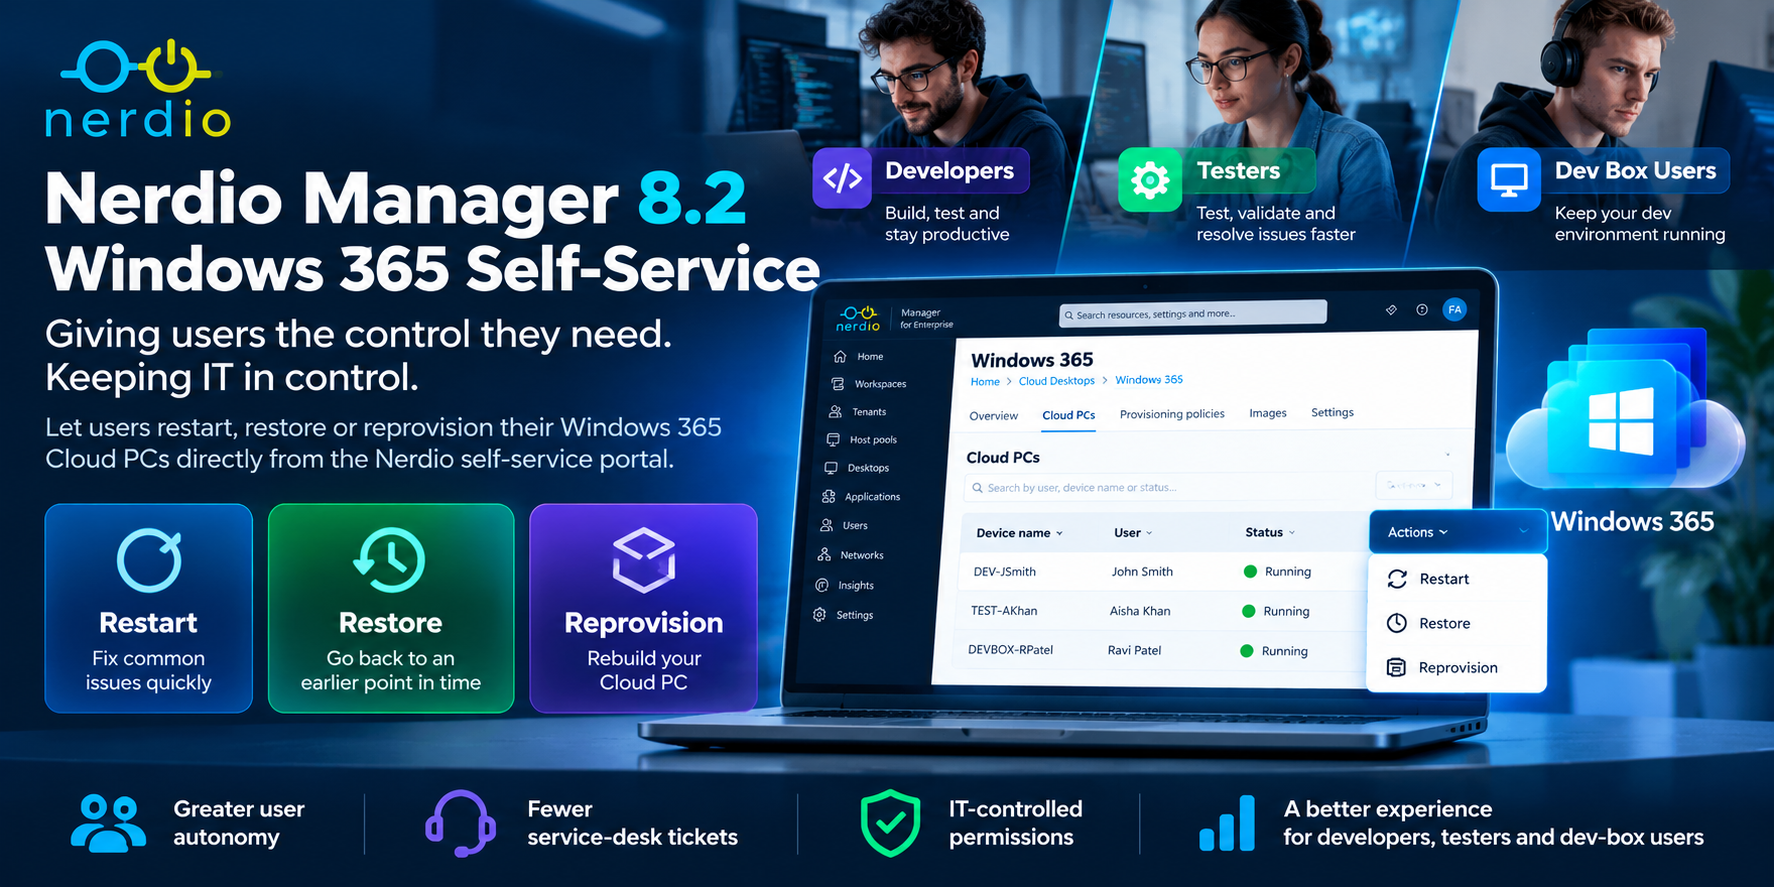
What's New in Nerdio Manager 8.2?
Nerdio Manager already provides administrators with Windows 365 management capabilities. Version 8.2 extends the experience by allowing users to perform specific operations directly through a simplified Nerdio interface.
The feature is available for supported Windows 365 Enterprise environments and is configured at the provisioning policy level.
This means different user populations can have different self-service permissions.
For example, an organisation could allow standard knowledge workers to restart their Cloud PCs while reserving more disruptive operations for users with additional training or an approved support process.
The three main actions are:
- Restart: Reboot the existing Cloud PC.
- Resize: Select alternative VM Size
- Restore: Return the Cloud PC to an earlier restore point.
- Reprovision: Delete and rebuild the Cloud PC using its current provisioning policy.
Although these actions are available from the same portal, their impact is very different.
Watch: Nerdio Windows 365 Self-Service
The following video provides additional context around Nerdio's Windows 365 capabilities.
Understanding Restart, Restore and Reprovision
Before enabling self-service, administrators should understand the operational impact of each action.
1. Restart – The First Troubleshooting Step
Restart performs a standard reboot of the user's existing Cloud PC. It can help resolve temporary operating-system or application problems without rebuilding the desktop.
Typical scenarios:
- An application has stopped responding.
- The Cloud PC is behaving unexpectedly.
- A restart is required after an update.
- The user needs to recover from a temporary operating-system issue.
The existing operating system, installed applications, configuration and saved data remain in place.
However, unsaved work may be lost.
Fabs Field Recommendation
Restart is the lowest-risk action of the three and a sensible starting point for a controlled self-service rollout.
2. Restore – Recovering from a Recent Problem
Restore returns the Cloud PC to an earlier point in time. This can be particularly useful when a problem appeared following a software installation, configuration change or operating-system update.
For example:
Cloud PC working normally
↓
Application update introduces a problem
↓
User selects an earlier restore point
↓
Cloud PC returns to its previous state
However, Restore has an important consequence. Changes made after the selected restore point can be permanently lost, including locally stored files, installed applications and configuration changes.
Data stored separately in cloud services such as OneDrive is not rolled back with the Cloud PC, although administrators should verify the organisation's data-protection arrangements.
Fabs Field Recommendation
Enable Restore only after establishing a clear restore-point strategy and educating users about potential data loss.
Where possible, use the most recent healthy restore point that predates the problem.
3. Reprovision – Rebuilding the Cloud PC
Reprovision is the most disruptive of the three actions.
It deletes the existing Cloud PC and provisions a replacement using the current provisioning policy.
This means the existing operating system, locally stored data, applications and customisations are removed.
A new Cloud PC is then deployed according to the organisation's current configuration.
Typical scenarios:
- The existing Cloud PC is severely corrupted.
- Troubleshooting has failed to resolve a persistent issue.
- A fundamental provisioning change requires rebuilding the desktop.
- IT has determined that rebuilding is preferable to further repair.
Reprovisioning is not simply another restart.
It is a destructive lifecycle operation.
Fabs Field Recommendation
I would not enable Reprovision for all users by default.
Consider restricting it to appropriate user groups and make sure important data is stored independently of the Cloud PC, for example through OneDrive and other approved Microsoft 365 services.
How to Enable Windows 365 Self-Service
Nerdio provides a straightforward configuration process.
Step 1 – Verify the Prerequisites
Before enabling the feature, confirm that:
- The users have assigned Windows 365 Cloud PCs.
- Users are assigned the Nerdio Manager End User RBAC role.
- The administrator configuring the feature has at least Manage Policies permission in Nerdio's Intune module.
- The relevant Windows 365 provisioning policies are available in Nerdio Manager.
The feature is enabled against provisioning policies rather than through a single tenant-wide setting.
Step 2 – Open Windows 365 Provisioning Policies
In Nerdio Manager, navigate to:
Cloud Desktops → Windows 365 → Enterprise → Provisioning Policies
Locate the provisioning policy containing the Cloud PCs for which self-service should be enabled.
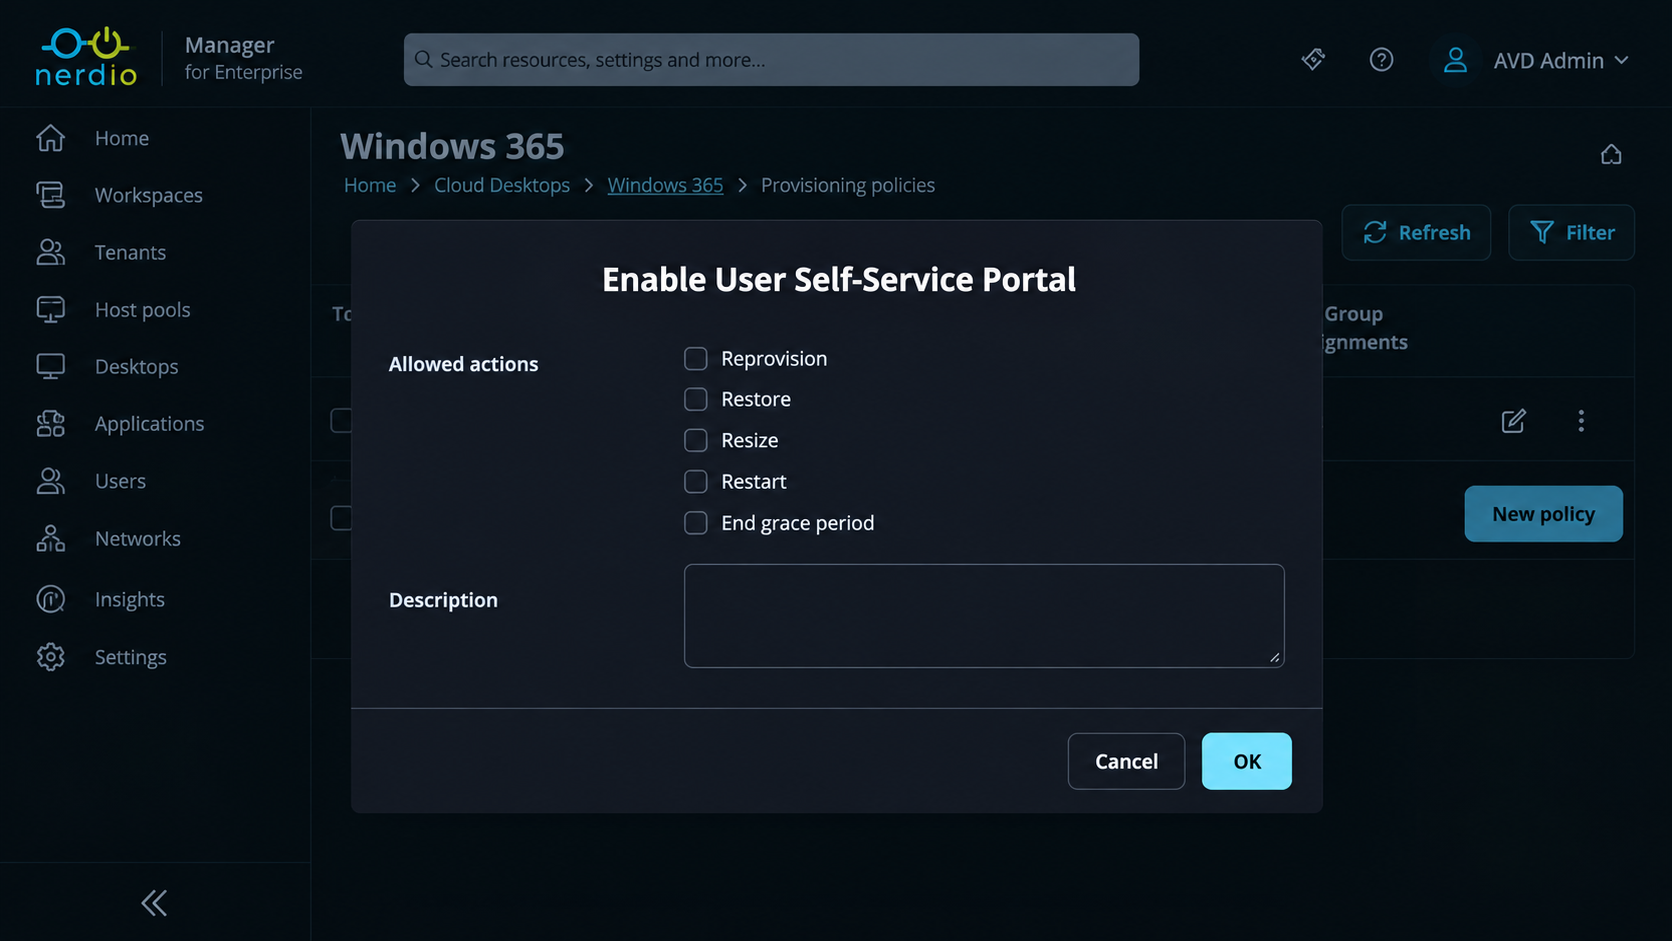
Step 3 – Enable the Portal
From the provisioning policy's action menu, select:
Enable User Self-Service Portal
Nerdio displays the configuration options for the policy.
Step 4 – Select Allowed Actions
Under Allowed actions, select which operations users may perform:
- Restart
- Restore
- Resize
- Reprovision
Administrators can choose the appropriate combination for the user population.
An optional description can also be added to document why self-service has been enabled.
Select OK to save the configuration.
Step 5 – Validate the End-User Experience
Once the policy is configured, an eligible user signs in to Nerdio Manager.
The user sees a simplified interface with access to:
Cloud Desktops → Self-service → Portal
From the action menu beside their Cloud PC, they can select one of the operations permitted by IT.
Users do not receive access to the wider Nerdio administration interface simply because self-service has been enabled.
Step 6 – Modify or Disable Self-Service
Administrators can return to the provisioning policy and select:
Configure User Self-Service Portal
to modify the available actions.
Alternatively:
Disable User Self-Service Portal
removes the feature from that provisioning policy.
This provides a straightforward way to adjust permissions as operational requirements change.
Recommended Self-Service Strategy
Not every user population should receive the same permissions.
I would recommend starting with a conservative rollout.
| User population | Restart | Restore | Reprovision | |||
|---|---|---|---|---|---|---|
| Standard knowledge workers | Allow | Restricted | Restricted | |||
| Trained power users | Allow | Consider | Restricted | |||
| IT pilot users | Allow | Allow | Consider | |||
| Support-managed recovery | Allow | Controlled | Controlled |
These are recommended operating policies rather than technical restrictions imposed by Nerdio.
The actual configuration should reflect the organisation's data-protection requirements, service-desk processes and risk tolerance.
Why This Matters for IT Operations
Consider a large Windows 365 deployment.
A user experiences a temporary application problem and needs to restart their Cloud PC.
Without an appropriate self-service option, the process may involve:
User reports problem → Service-desk ticket → IT investigation → Restart → Ticket closure
With self-service:
User identifies problem → Opens Nerdio portal → Restarts Cloud PC → Returns to work
This does not eliminate the need for support.
But it can remove unnecessary administrative steps from common recovery scenarios.
For more disruptive operations, IT can retain tighter control.
The result is a more balanced operating model:
Greater user autonomy + Defined permissions + Reduced routine administration
It is also worth recognising that Microsoft already provides some native Cloud PC self-service capabilities. The value of Nerdio's addition is the ability to expose these operations through its own managed portal, with provisioning-policy-based configuration alongside the wider Nerdio operating model.
Final Thoughts
Nerdio Manager 8.2's Windows 365 self-service enhancement may appear relatively small compared with major infrastructure features such as AVD Hybrid or Global Pools.
But from an operational perspective, I think it deserves attention. Not every Cloud PC problem should require an administrator.
At the same time, not every user should be able to rebuild their desktop without understanding the consequences.
Nerdio provides a mechanism for organisations to balance those two requirements.
My recommendation is to start with Restart, introduce Restore only where the recovery and data-protection processes are mature, and keep Reprovision tightly controlled.
The objective isn't simply to give users more functionality.
It's to reduce avoidable service-desk workload, improve recovery times and let IT concentrate on the problems that genuinely require administrator involvement.
References and Further Reading
Nerdio – Windows 365 Self-Service Portal
Nerdio – Manager for Enterprise 8.2 Release Overview
Microsoft – Reprovision a Cloud PC
Microsoft – Restore a Cloud PC
Microsoft – Cloud PC End-User Management Actions
Microsoft – Windows 365 User Data Guidance
Click Here To Return To Blog